Aim
To show a counter-intuitive example of stable equilibrium that can be explained through minimum potential energy
Subjects
1J20 (Stable, Unstable and Neut. Equilibrium)
Diagram
Equipment
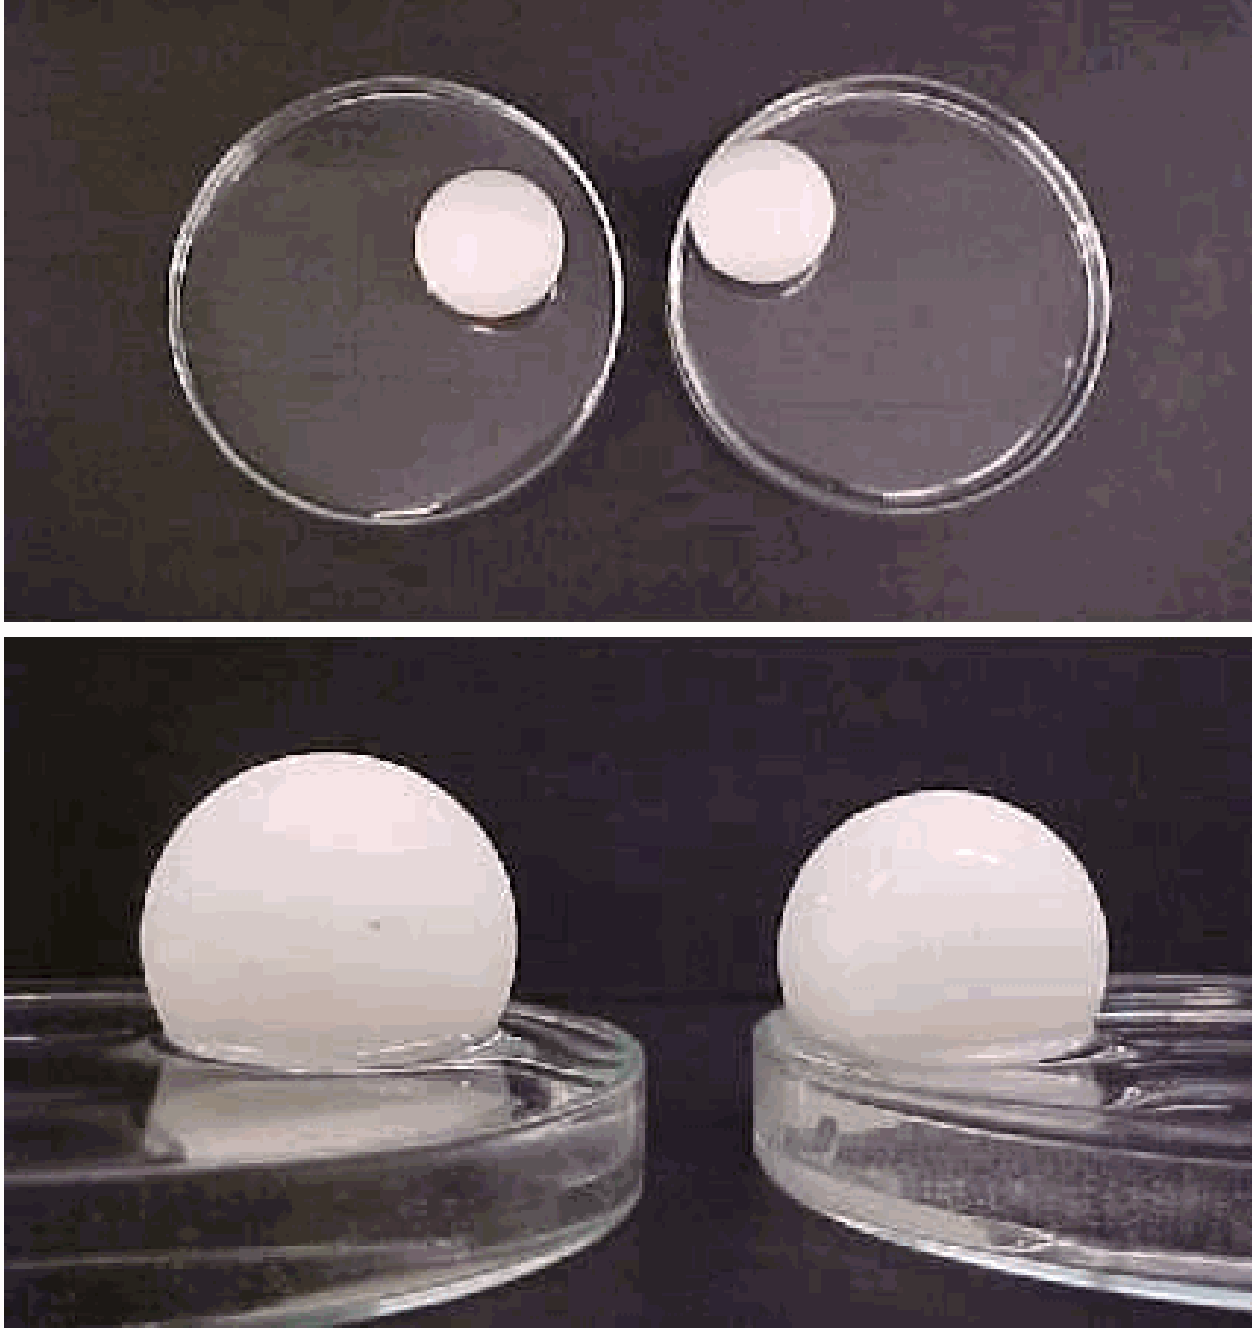
Two Petri dishes.
Two table tennis balls
Presentation
One Petri dish is filled half with water, and the table tennis ball is floating in it. It moves a bit, and at a certain moment, it will hit the rim and stick to it. When carefully observing, as the ball approaches the rim of the petri dish, it will accelerate toward it! There is an attractive force acting.
The other Petri dish is filled with water to the rim and even a little bit more; the water level is higher than the rim. The table tennis ball is floating around but never touches the rim. Again, carefully observing the motion of the ball, it can be seen that as the ball approaches the rim, it slows down and is repelled. There is a repelling force working.
Explanation
The difference between the two Petri dishes is the shape of the meniscus of the water surface. The dish that is half-filled with water has a hollow meniscus, while the other one has a spherical meniscus. The ball in the half-filled dish floats upwards when approaching the rim. This is the counterintuitive part of the demonstration. The same holds for the ball floating in the filled dish; this ball “refuses” to float downwards when approaching the downward incline.
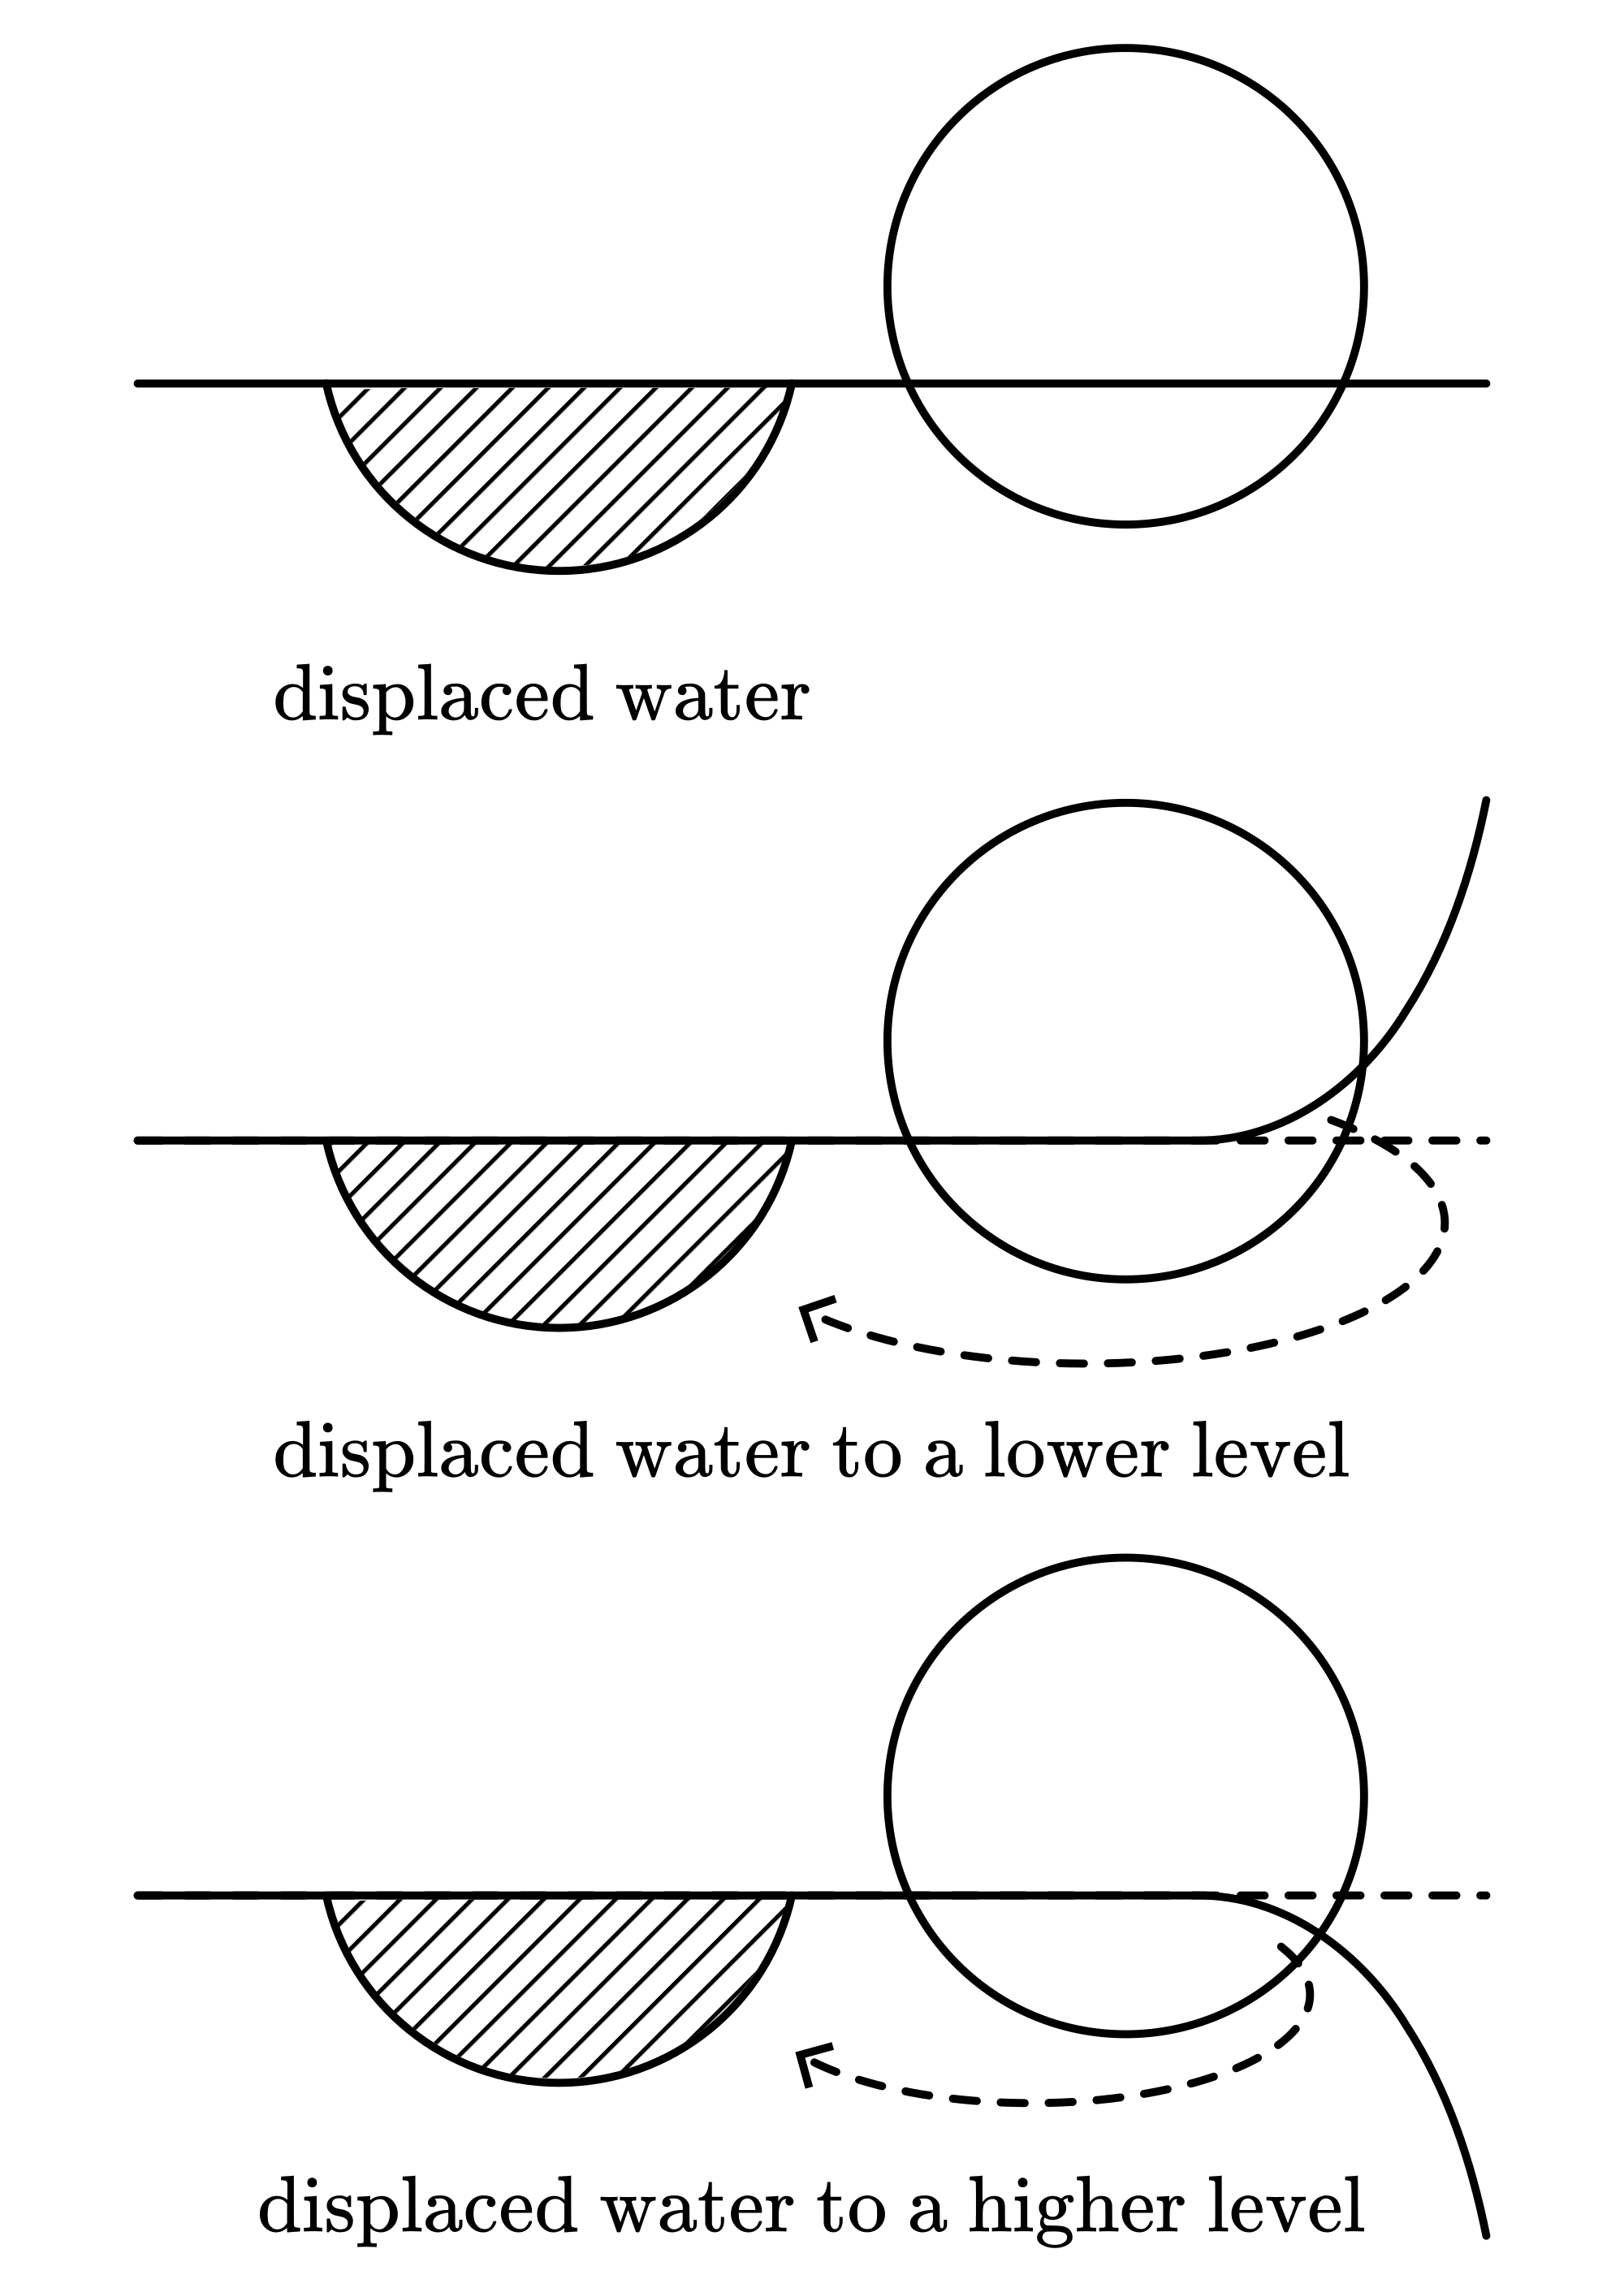
The key to understanding is the condition for equilibrium in a conservative force field, which reads: . This equilibrium is stable when (potential energy) is a minimum. Applying this to our demonstration, we have to consider not only the table tennis ball but also the water it displaces. To achieve an equilibrium, the common center of mass of these two should be positioned as low as possible, and so, the table tennis ball as high as possible. In the situation with the hollow meniscus, this is in the water at the rim. In the situation with the spherical meniscus, this is in the water away from the rim (see also Figure 2).
Remarks
This demonstration can be shown on an overhead projector.
You can also show this demonstration with one ball and a Petri dish. Place the ball in the Petri dish and slowly fill the dish with water. When the ball is floating, it will first stick to the rim, but as the filling continues, at a certain moment, the ball will float away from the rim.
You can also place the dishes with water and balls in your lecture room. A draft in your room will make the balls float around. The performance of the balls will puzzle your students.
Sources
Roest, R., Inleiding Mechanica, pag. 76-78;188-193