Here we describe how to install the software required. You can do it on your own, but we advise to do it during the first lecture. Moreover, do not worry when things are not yet fully clear - it will take some time to understand what is happening and why we think this is a good way to work.
Software
In this course you’ll learn to work with Python using Jupyter Notebooks. In order to work with Python and Jupyter Notebooks, you’ll need some software to open and run the files. Installing the software and all dependencies (packages) can be quite some work if done one-by-one. However, we’ll work with a package manager called Pixi. Pixi helps to install the software and dependencies and allows for others to run your scripts if you provide the associate .toml file (no worries if you don’t understand yet).
We also encourage you to install Visual Studio Code, which is a popular code editor. It allows you to program in different languages, where it recognizes the commands in that language and adjusts the FONT so that it becomes better readable. Moreover, it allows you to install various packages (such as Jupyter Notebook). It also integrates GIT and allows to code using Co-Pilot, an AI pair programmer.
Jupyter Notebook and Jupyter Lab
In this course we make use of .ipynb files which are Jupyter Notebooks. To run these notebooks we can use integrated development environments (IDE’s) as Jupyter Notebook or Jupyter Lab. Jupyter Notebook is a web-based interface that allows users to create and share documents with live code, visualizations, and narrative text in a linear format. JupyterLab, on the other hand, is a more advanced interface offering a flexible and modular environment with multiple panels, including notebooks, terminals, and text editors, providing a more versatile experience for interactive computing. I prefer to use Jupyter lab - and that is thus the one we will be working with in this course.
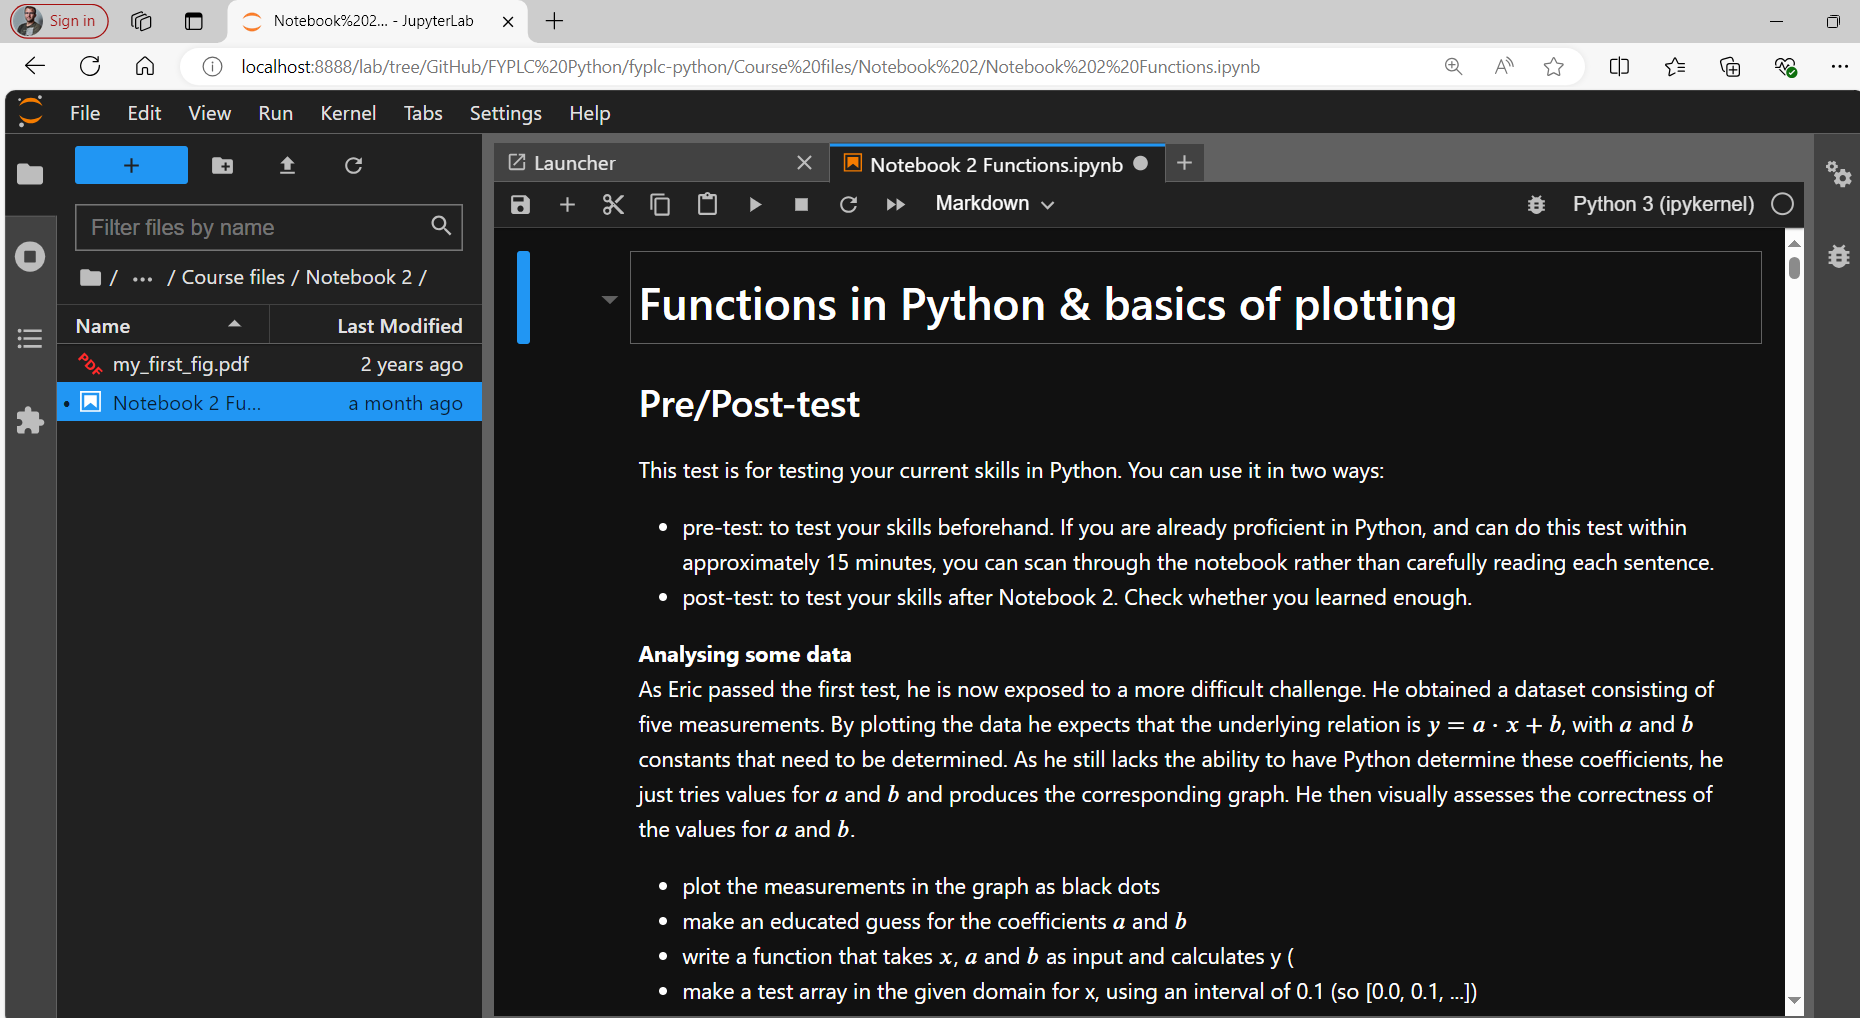
Figure 1:The Jupyter lab IDE
Installation steps
Go to Pixi’s website and install pixi on your machine.
Download the course files and unzip it in a folder called
FYPLC(preferably inTN/1ejaar/IP/FYPLC).
By now you have everything that you need. Pixi will take care of the installation of the software.
We did not yet install Python and packages. We will do so now.
Navigate to the
FYPLCfolder, right click on the folder and chooseOpen in Terminal.Type
pixi installand hit enter.
We already created a .toml file in which we specified what needs to be installed. It will take a while for your computer to download and install all packages.
Run course files
Once everything is installed simply type pixi run jupyter and hit enter. This will work because in the .toml file we created a task called jupyter which runs jupyter lab. Hence, running pixi run jupyter is equivalent to pixi run jupyter lab.
Start new projects with pixi
For this course we created a pixi.toml file for you. We specified which software / libraries / packages should be installed. What if you have a new project where you need to use Python?
We derive the steps below from pixi’s own manual.
Navigate with the terminal to the folder of your project.
Run
pixi initto create a new Pixi workspace.Include the packages that are needed for that project by
pixi add <package name>, e.g.pixi add numpy. [1]Start your task by running
pixi run <task>, e.g.pixi run jupyter lab.
An option is to create tasks in your pixi.toml file, e.g. the task start which then starts the IDE.
Working with and in a terminal
The terminal is a ‘tool’ that lets you interact with your computer through the so called command line. It is used to run commands, scripts, or programs without leaving the coding environment. For example, you can compile code, run a development server, install dependencies, or manage files. It’s very helpful for developers because it allows you to code and execute commands in one place, streamlining your workflow.
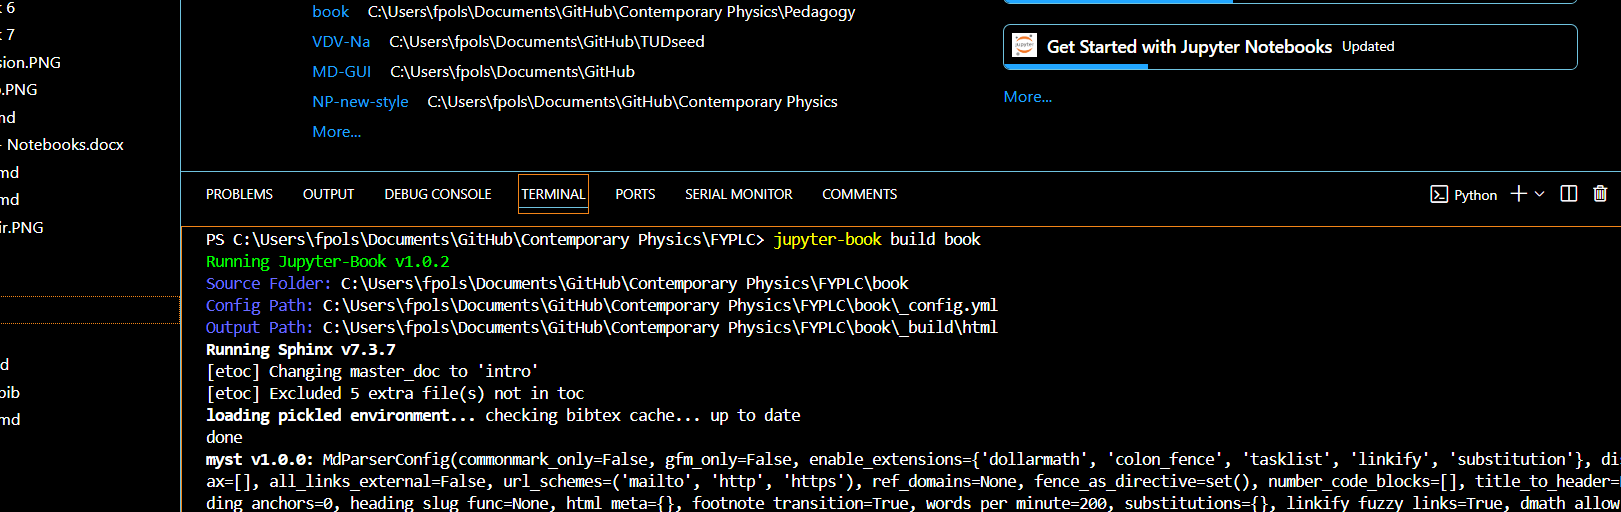
Figure 2:The VSC terminal to interact with the computer using the command line
Using the command line
Normally we navigate through our folders by using a graphic interface and clicking through the folders. However, there is another way to navigate through your folders, namely using the command line as we are doing with Anaconda prompt.
When you run the command dir it returns the folders and files in the folder you are currently in. You can go to another folder by running the command cd NAMEFOLDER. If you want to move to a higher folder, run the command cd ..
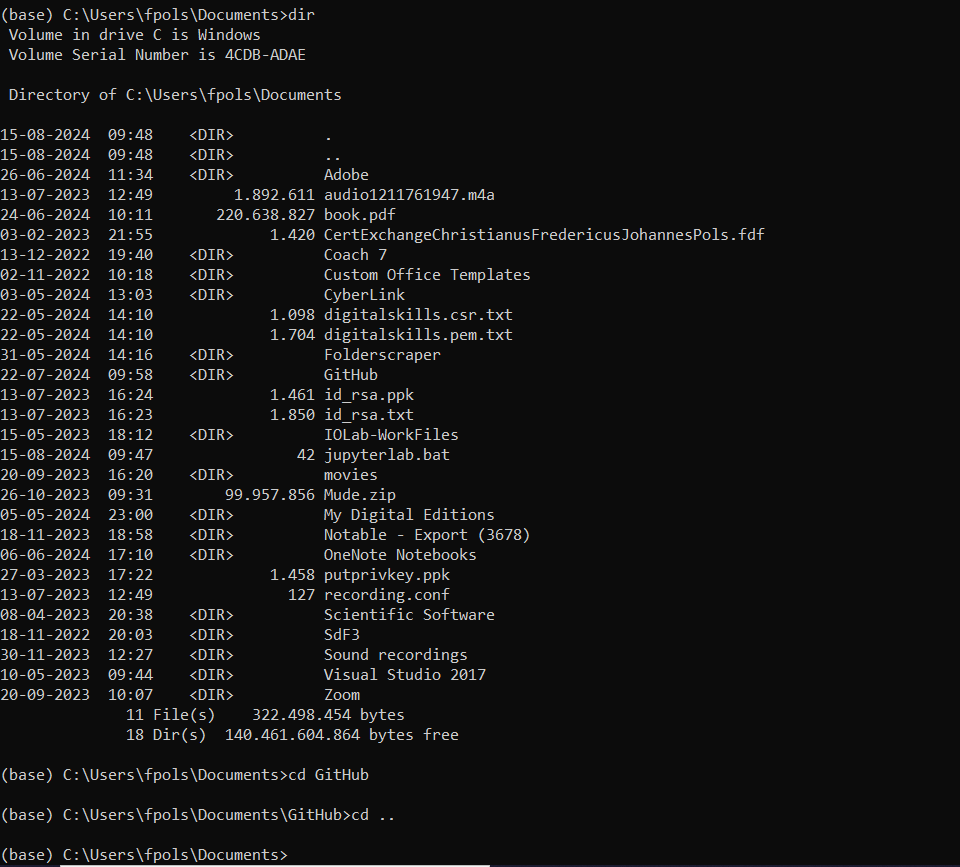
Figure 3:Moving through your folder with the command line
Conceptmap
| Term | Description |
|---|---|
| Jupyter | Open Source Project |
| Jupytext | Jupyter notebooks into plain text files you can edit in any IDE |
| Jupyter Notebook | web-based interactive computing platform |
| Jupyter Lab | application to run notebooks |
| Markdown | a markup language |
| Jupyter Book | a collection of notebooks presented as a book / website |
| Pixi | a package manager to install/manage the above |
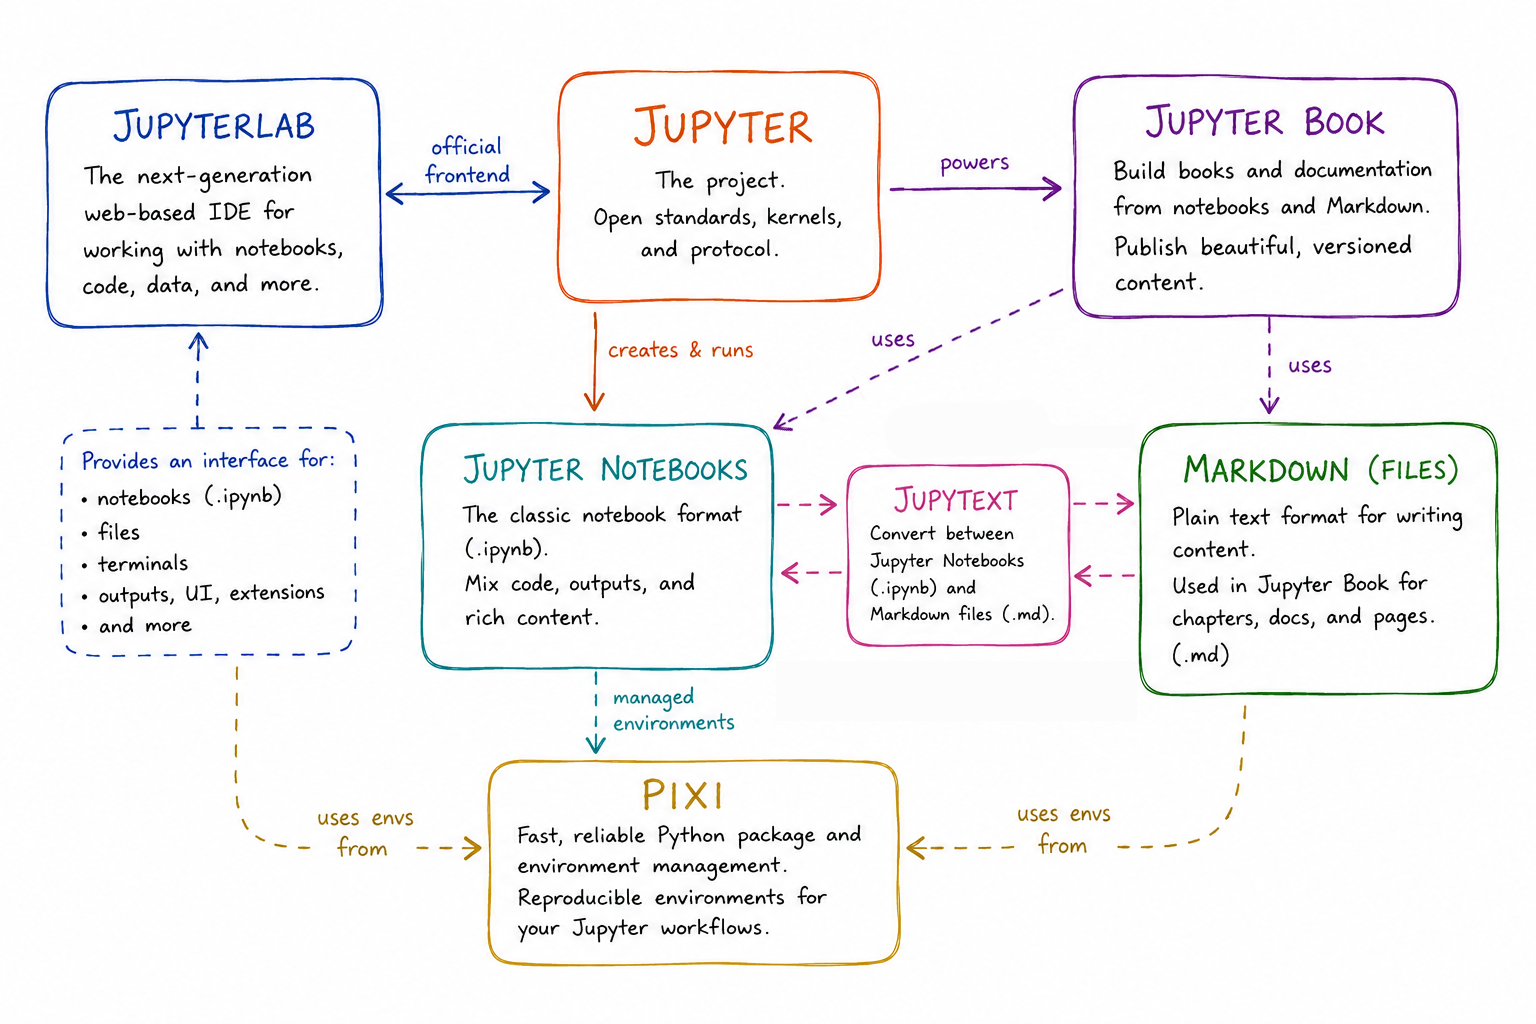
Figure 4:A concept map of Jupyter, Jupyter Notebook, Jupyter Book, Markdown, Jupyter lab & Pixi. Figure AI generated
Note that some packages are only available through pypi, these can be included using
pixi add --pypi <package name>