Here we present an exercise to get you acquainted with the branching workflow of GitHub.
But first what is a branch and why do we use them?
A branch is a separate version of your files, which can be changed without changing the original. This is very useful when you want to try something in different ways but are not yet sure which way is the best, or when you are working together with other people in the same repository at the same time.
Often after using different branches, you want to combine these branches again. This is called merging branches. This can be very easy when the branches have no parts which are different between the two branches. For example when you have a branch 1 with file A, and a branch 2 with file A and file B. However, sometimes you have changed things in one of the branches and they have conflicting parts, for example when branch 1 has a file A version 1, and branch 2 has a file A version 2. Now you have a merge conflict. This can then be resolved by picking which parts of each branch you want to keep, and which parts you want to discard.
Go to your repository and navigate to the branch menu and create a new branch. This can be found under
code.For the branch name you should use a name that describes what it is for. such as “practicum_week1” check that the source is set to the branch from which you want to create your new branch (in this case ‘main’).
Now that you have a branch you need to select it as your working branch in VSC.
Open VSC and navigate to your repository. Open the Source Control panel on the left (Ctrl + shift + g) where your repository should listed under “Repositories”. There it also shows which branch you are running on
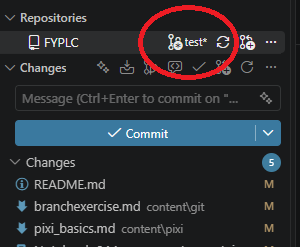
Figure 1:You can see what branch you are working on in the source control panel or by running git branch in the terminal
Clicking on the three dots leads to a drop down menu. Using this menu you can create a new branch. Note that this branch is only alive locally and needs to be ‘published’ to become visible for others.